Sample Drawing:
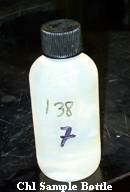
1.  Chl samples are drawn on all rosette bottles tripped from ~200m to surface; sampling on a standard 20-bottle cast usually starts at #7 but refer to electronic sample log. For shallow stations, all the bottles may be sampled; noontime prodo casts may have extra bottles to sample; duplicate depths are usually skipped. Refer to the electronic sample log to verify which bottles to sample or ask the watchleader.
2. Drawing from the middle valve, add ~20mls, cap loosely, rinse-shake then dump; three rinses. Double-check the sample bottle number matches the rosette bottle number (often).
3. Chl samples are volumetric so after rinsing, fill it completely, cap loosely, tap the bottle gently against the rosette frame to dislodge any small bubbles then top-off, cap tightly, invert the bottle – if you see a large bubble, top-off and check again. Squeezing the sides of the bottle can change the sample volume so cup the bottle in your palm during the final fill to minimize this problem.
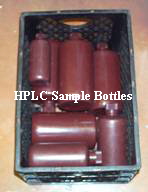
4. Once all the chlorophylls, salts, & nutrients have been drawn, draw the LTER water samples such as HPLCs. The sample volume may vary with chlorophyll concentration so check with the LTER technician for bottle size and sample depths.
5. Again, all bottles are rinsed three times then fill completely.
6. Once samples are drawn, the electronic sample log will print the filtering form.
7. When filtering chlorophylls: take the chlorophyll sample form from the printer along with the chlorophyll samples to the chl van & filter ASAP. The prodo experiment filtrations in the evening may delay the filtrations so ask to be notified when the chl van is available.
Filtrations:
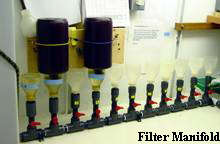
1. The chl van filter manifold needs to have filters installed so turn on the vacuum and carefully install GFF filters & funnels. Once all filters are installed, carefully pour each sample into the filter funnel. These are volumetric samples so  it is important not to lose any by spilling or ill-fitted funnels. Again check the sample bottle number matches the filter station number. Keeping track of bottle & sample numbers are a critical aspect of our work.
2. If you spill any sample, discard the remainder, replace the filter, redraw the sample from the rosette. You can wait to do this after all the other samples are done filtering but do it before removing the filters so the vial/sample sequence remain intact. If you wait too long the rosette bottle may be drained or dumped. Be sure to pour the redrawn sample into the correct funnel.
3. Monitor the sample filtration and close the vacuum valve soon after the sample is filtered.
4.  While samples are filtering, load an empty tube rack with the next sequence of acetone-filled tubes (from the bins below the counter). The tubes are consecutively numbered and should continue the sequence from last station, verify this by looking at the chl sample log (clipboard) from the previous station. Also check the tube volume contains 8 mls (level should be above white label area - see photo). If the acetone is low, replace low-volume tube with a full volume spare & switch caps. Once all the samples are filtered, turn off the vacuum.
5. Carefully, remove the filter funnel from the base, remove the vial cap and carefully tweeze the filter into the tube - rolling it on the filter base then sliding it carefully into the tube, at least 1cm below the surface; if the filter tears, be sure all the pieces are retrieved and submerged. If the filter drops onto the counter or floor you will have to redo the sample (you can protect the counter with a fresh paper towel or bench protector sheet to avoid having to do this). Be careful not to displace acetone out of the tube when inserting the filter. Avoid crumpling or balling up the filter & be sure it is completely submerged. Repeat for all the samples. Be sure all the tubes are capped tightly. Keep track of the tube, sample & funnel order.
6. Fill out the chlorophyll sample log with filtration time, your initials, the vial numbers, volumes, and rack letter.
7. Place the vial-rack in the fridge, label-out; bungie the door closed. Samples are light-sensitive so be sure they are in the dark (in the fridge, box or foil-covered) until they are analyzed.
8. Turn on the vacuum and open the valves slightly. Tweeze new GFF filters onto each filter base, centering them carefully on the frit then reattach the funnel, being sure the filter stays centered (vacuum helps) and funnel seats properly by wriggling it slightly. (If this step is not done correctly then next sample will spill out the sides and require a sample redraw).
9. Return the empty chl sample bottles to the wet lab and check-in with the watchleader or LTER supervisor.
Common mistakes: spillage - sample loss from pouring or squeezing the sides of the bottle when uncapping; filter bypass - filter was not centered on the frit; funnel was loose or skewed; filter falls onto counter or floor when funnel is removed or during transfer to vial; vial skipping and/or disorder; poured a sample into a funnel that already has a sample; new filters are not installed for next station; acetone displaced/lost during filter insertion. Putting two filters into one tube, spoiling both samples.
